How to Create the Illusion of Depth in Sidewalk Art
Follow these steps to add together depth to your landscapes with linear and aerial perspective.
Past Michael Chesley Johnson
As a landscape painter, I aim to make my pictures look real. This ways conjuring upwardly an illusion of depth that gives viewers the feeling they could stroll right into the scene. Without this bit of magic, the motion-picture show looks flat and uninviting.
Two Types of Perspective
When nosotros go for a walk, we have the benefit of seeing the globe with stereoscopic vision. Our two eyes permit us to see what's closer and what's farther away, which helps usa to navigate without bumping our shins. On the other hand, the viewer of a painting is, in a sense, visually handicapped. Because the surface of a painting is flat, looking at information technology is like seeing the scene with only one eye. In social club to aid the viewer, I like to "push" the illusion of depth.
This is where perspective comes in; it'southward vital to creating the illusion of depth. There are basically two kinds of perspective: linear and aerial. Linear perspective is the type we most oftentimes retrieve of. Its dictionary includes vanishing points; one-, two-, and 3-betoken perspective and horizon lines. An Italian engineer and architect, Filippo Brunelleschi, laid out this geometric organization for drawing buildings in 1413, during the Renaissance.
The 2d kind of perspective, aerial (or atmospheric), has to do with how the air between us and an object affects our perception of the object's color, particularly with regard to value, temperature, and chroma. Unlike linear perspective, which is an artificial system used to create the illusion of space, aerial perspective is a product of natural laws. Information technology was first used in kingdom of the netherlands during the 15th century. Leonardo da Vinci, amid others, observed and catalogued the effects and theorized why the effects occurred.
Prior to the Renaissance, many European paintings looked flat and two-dimensional. Equally observations grew more than astute and mathematics more precise, both aerial and linear perspective helped artists achieve a high level of realism, epitomized in Flemish still life and landscape paintings of the 17th century.
Linear Perspective Clues
The techniques of perspective can be boiled down to a few simple tricks. But they're not tricks, really; they're of import visual clues, all based on close observation from life. Every 24-hour interval we run across and visually interpret these clues, but we're and then used to them that we don't notice — unless we've developed a bang-up eye while in the addiction of working direct from life.
As artists, we need to recognize that these visual clues can be valuable tools in making a successful painting. Let's first take a look at what tools linear perspective offers us.
Overlapping objects
Overlapping objects tell usa what's in front of what (I allocate this with linear perspective considering it has to do with the positioning of shapes). It's a simple concept. We learned as toddlers that if one thing obscures another, that means the matter obscured is further away. It's surprising how often this concept is forgotten by beginning painters. You should overlap shapes every bit much every bit possible to make the spatial relationships articulate.
Scale
The scale, or apparent size of an object, diminishes with distance. We've all seen a row of telephone poles and noticed that the ones further off seem to be smaller. You don't demand telephone poles to make the illusion work in a painting. But include a few objects that are familiar to the viewer and of similar actual size (every bit opposed to apparent size) so that the diminution makes sense. Including figures is one way of showing scale.
Aerial Perspective Clues
Now allow's expect at aerial perspective. Air scatters sky calorie-free, and any dust or moisture suspended in the air increases the scattering. This handful is responsible for most of the atmospheric effects nosotros run into, and the more air between the viewer and an object, the more pronounced the effects are.
The next ii clues deal with the fashion temper affects value.
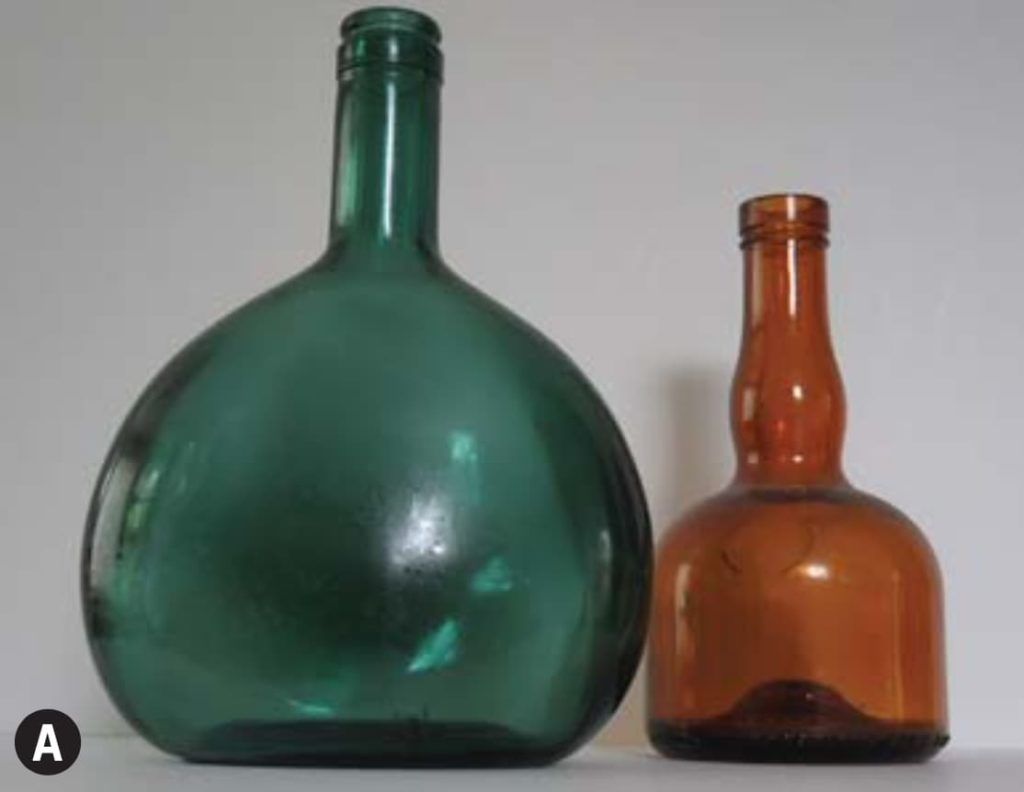
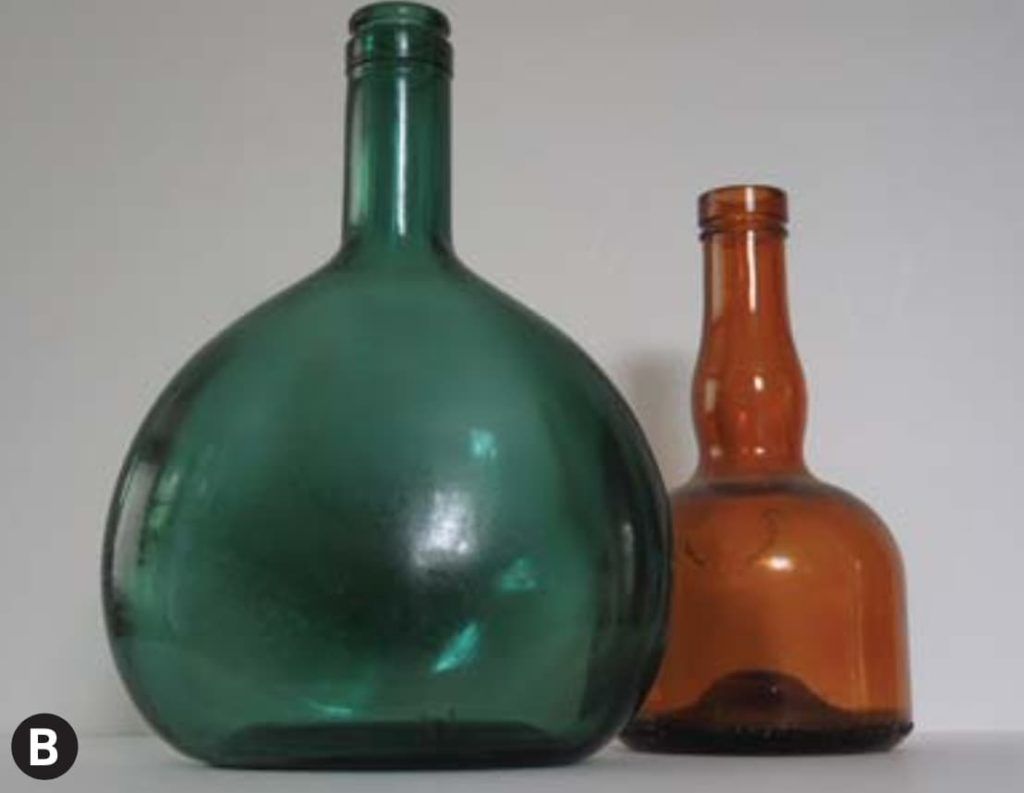
Contrast
Contrast decreases with altitude. Some of the scattered heaven light spills into dark areas or may even exist bounced back to the viewer, making the dark areas seem lighter. Light areas are as well affected, but the effect isn't as credible.
Sharpness of Edges
The sharpness of edges as well decreases with distance. An edge is defined equally a value dissimilarity betwixt two adjacent shapes, and the sharper the contrast, the sharper the edge. Because contrast decreases with altitude, the edges, being dependent on contrast, seem to become softer.
The next two aeriform perspective clues deal with color. Scattered sky calorie-free is a low-chroma blue, and that sky light affects the color of objects
information technology falls upon.
Temperature
The temperature of a color decreases with distance. The scattered blue sky low-cal shifts colors to the libation terminate of the spectrum. Colors don't necessarily become blue, however. Cerise, for example, becomes a dull red-violet, so a dull violet. Yellow becomes a dull yellowish-green.
Blush
The chroma (richness) of a colour decreases with altitude. The scattered bluish sky low-cal isn't a high-blush blue; instead, the blueish is mixed with white low-cal (other colors), thus lowering its chroma. This "impure" lite is what decreases the saturation of all colors in the mural. At infinity, one can wait the colour to become completely desaturated.
Additional Clues
At that place are ii more ways to create depth that I find helpful. Item (also as texture) diminishes with altitude. For example, in a grassy field, the foreground grasses may show individual stalks and leaves. Every bit you look farther out, the private stalks merge into larger masses.
In landscapes peculiarly, a road, stream or fence line that runs from the foreground into the altitude provides an easy path for the heart. Although this approach tin can exist heavy-handed, a subtle eye path can be an effective clue to receding distance.
Infinite in a Nutshell
In short, to create the illusion of depth and space, make sure you proceed your warm and rich colors, dark accents, textural marks, and detail in the foreground. Salve your cool and dull colors, softer edges, and low-dissimilarity elements for the middle ground and distance. In addition, use overlapping and scaled elements to suggest distance. Finally, if you can observe a path for the centre, include it. You tin can run into how I implement many of these clues in the demo below.
Even when I don't see all of these clues in the scene before me, I include or exaggerate their effects so visual depth is clearly conveyed. Doing so keeps my viewer from getting "lost in infinite."
Demo: Give the Viewer Some Space!
The post-obit demonstration shows how aeriform perspective, texture, and a path for the eye can be used to heighten the sense and illusion of depth in a landscape.
Materials:
- Surface: Canson Mi-Teintes pastel paper in steel gray
- Pastels: Prismacolor NuPastel, Faber-Catell Polychromos, Rembrandt, Mount Vision, Girault, Sennelier
- Fixative: Lascaux spray
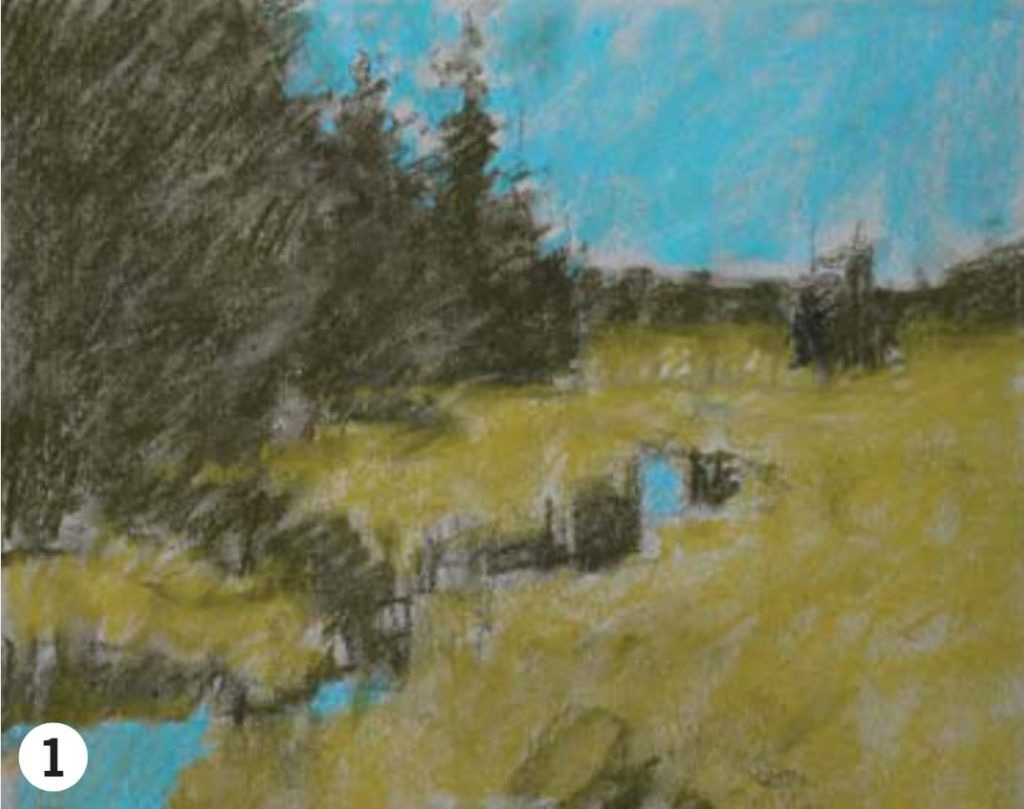
one. Block In
It's very like shooting fish in a barrel to block in a painting with just a few simple colors so use aeriform perspective to create the illusion of depth. In this first stage, I've blocked in with a dark, warm green for the trees; a lighter, warm green for the grassy area; and a mid-value blue for sky and water. This block-in has a apartment appearance, almost similar a poster. The only clues to distance come up from linear perspective elements: the path for the eye created by the stream and the diminishing apparent size of trees in the altitude.
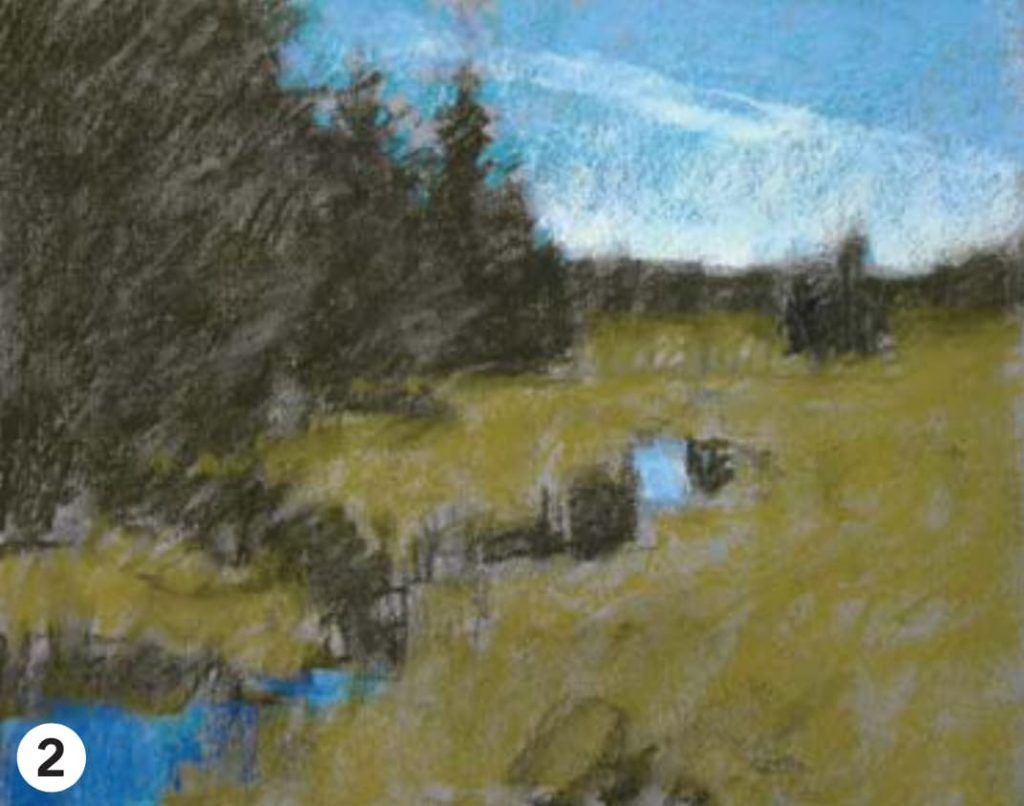
2. Set Value Range
My values were by and large correct, simply the sky and h2o were too flat. I lightened the lower sky with a creamy, light yellow tint. This value dictated how light I could make the distant line of copse. I similarly lightened the far end of the h2o, where it reflects the lower heaven. I darkened the nigh h2o, where it reflects the unseen overhead heaven, with dark purple. This dictated how nighttime (and saturated) I could make the grasses.
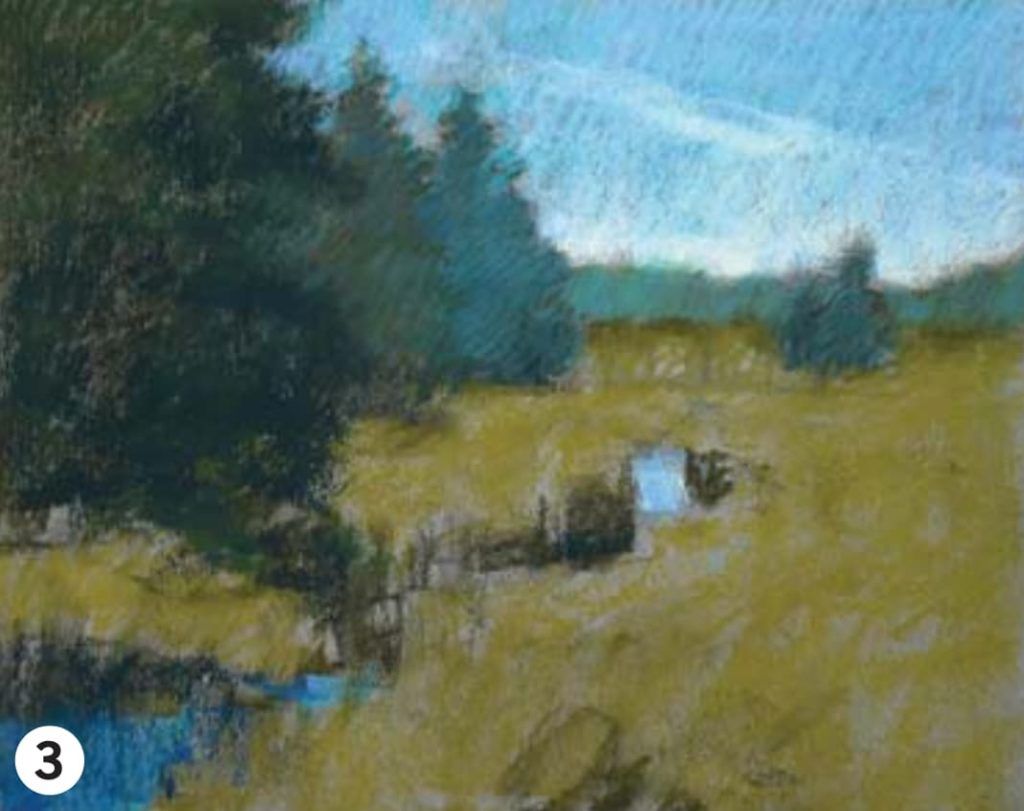
3. Adapt Tree Values
I scumbled over the farthest trees with lighter, libation greens, and also some dejection. Equally I worked my way to the closer trees, I used darker and warmer greens. I besides introduced a very dark note into the shadowed side of the closest tree so it would have more dissimilarity between light and dark. After my initial pass in these areas, I went back in with blues and greens to fine-tune the effect until I was satisfied with the illusion of depth and altitude.
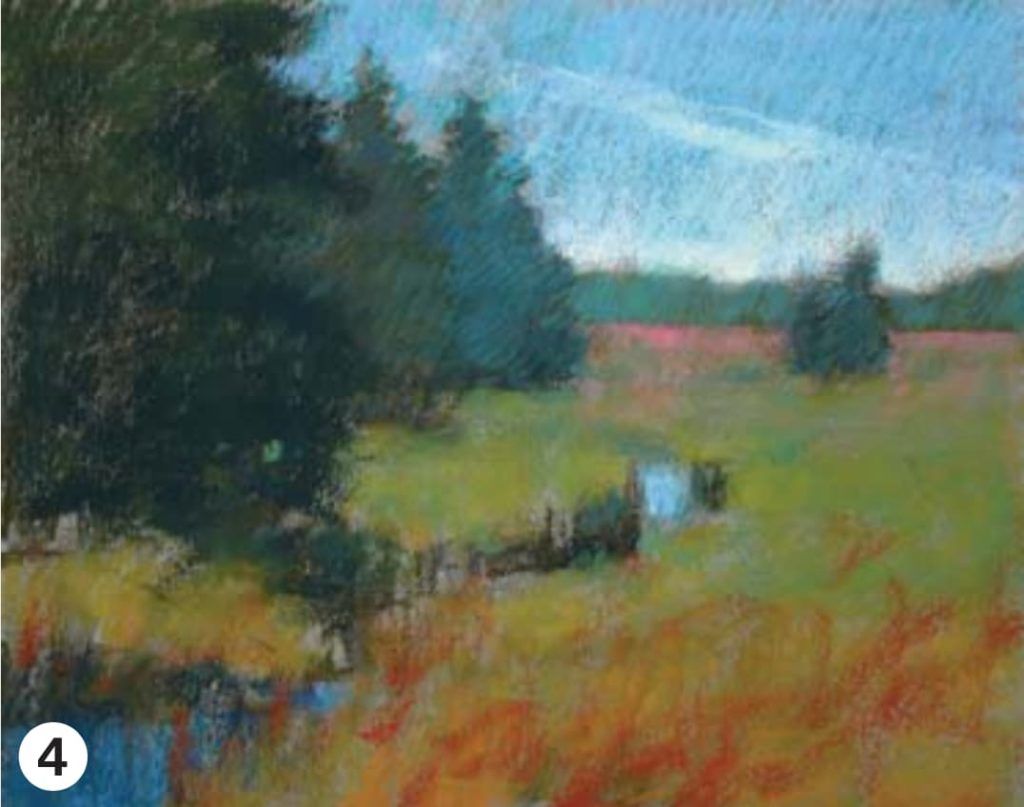
4. Suit Grass Values
The grasses needed a like handling. I worked a light ruddy-violet over the most distant grasses to both grey down and cool the greens. Every bit I moved from background to foreground, I started with cooler blue-greens and gradually warmed up the colors, ending with oranges, reds, and yellowish- greens. In the altitude I kept my marks pocket-size and soft, but in the foreground I made them larger and sharper- edged to make the grasses seem shut to the viewer.
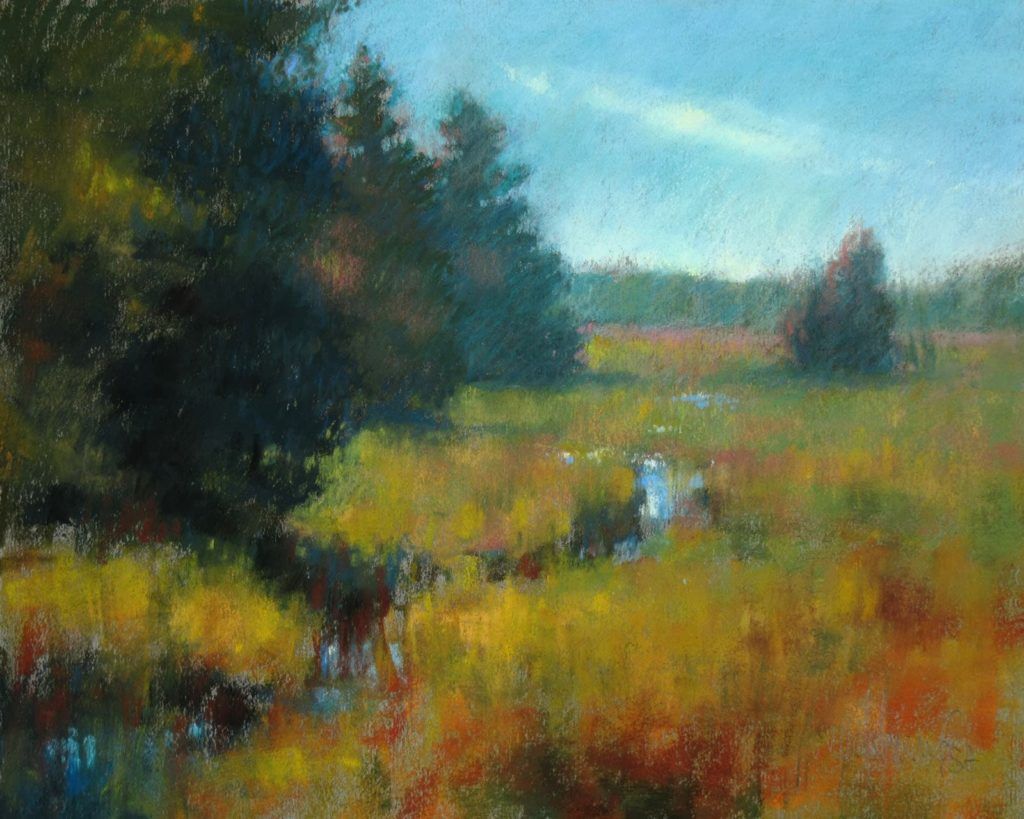
5. Final Touches
I continued fine-tuning the temperatures, chromas, values, textures, and edges, resulting in a disarming illusion of altitude in Barrier Beach Grasses.
Michael Chesley Johnson is a frequent contributor to Creative person'due south Magazine. Johnson teaches plein air workshops throughout the United States. Visit his website at mchesleyjohnson.com.
frostsquithrilve52.blogspot.com
Source: https://www.artistsnetwork.com/art-techniques/perspective/how-to-create-the-illusion-of-depth-a-demo/
0 Response to "How to Create the Illusion of Depth in Sidewalk Art"
Post a Comment